
Creating a Website with the Drag-and-drop Builder: AI Features, Publishing, and Your Own Domain
With the Drag-and-drop Builder (our Sitebuilder) you build your own website, with help from AI features for the setup, the texts and the SEO. In this article you'll read how to get started, how to publish and how to get your site on your own domain. Would you rather have the AI build your whole site? Then use the AI Builder, see AI Builder: having your website built.
Step 1: opening the builder
In My WebOké, go to My Products › My Sitebuilders and choose the Drag-and-drop Builder tab. Click Start next to your domain. Don't have a builder yet? Then first click Add (see Your site on your own domain below).
In the builder, the main screen is set to Wizard by default: the AI wizard that automatically builds a website for you. In the left menu you'll also find the 213 templates you can choose as a starting point.
Step 2: filling in company name and category
Fill in your company name and the type of website. For example, if you have a bookshop called "Bookmania", enter that here. Then click Edit website. Building the website takes 1 to 2 minutes.

After that you arrive directly on your new site in the builder.

Step 3: having texts written
The site contains sample texts that you can edit. Click a text block and choose Generate text.
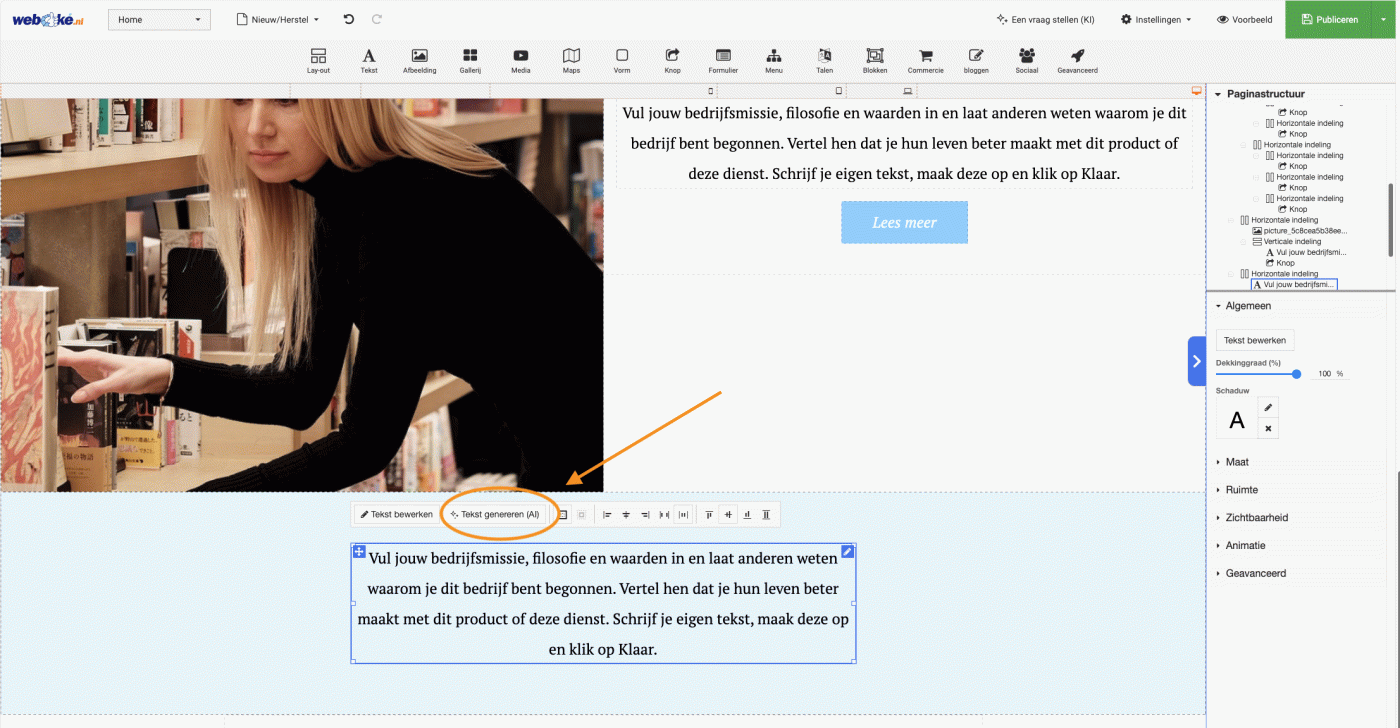
- Choose the topic of the text block. If it's for example the footer of the page, indicate that. The text will then be written in that style.
- Enter a few keywords, such as "affordable books", "rare novels" and "cosy coffee corner".
- Choose the length of the text, for example five sentences.
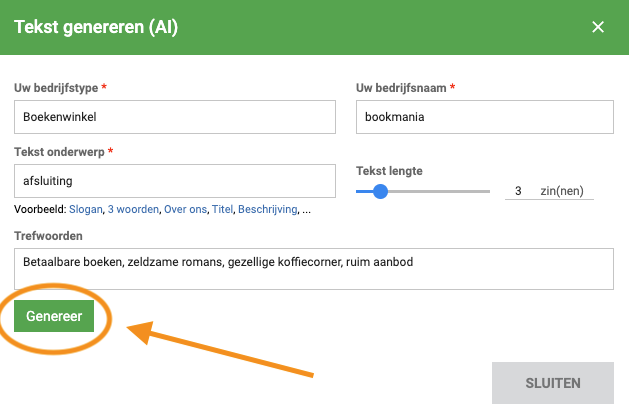
The AI creates three text suggestions and you pick the best one. Want more options? Click Generate more.

Do this for every text on your website. You can also edit titles, or leave the suggested titles as they are if they're good.
Step 4: setting up SEO
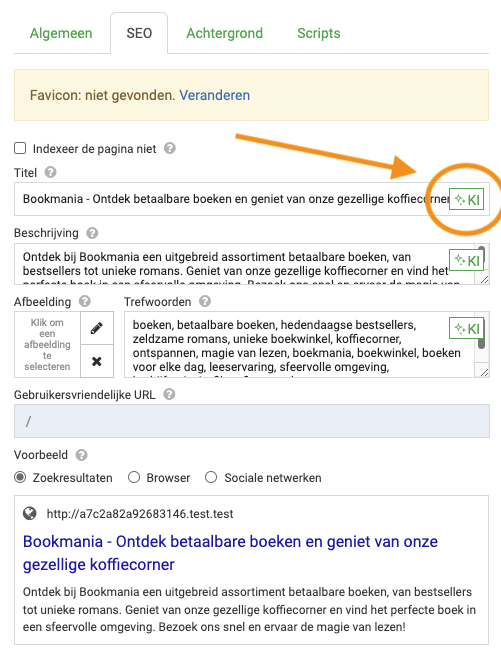
With good SEO settings your website is easier to find on Google. Open the dropdown menu and click Edit.

Make sure the right page is open, for example the homepage, and click SEO. With the AI button (in the builder it's still called AI) you automatically create a title that works well in search engines. Do the same for the description. Keywords are less important these days and can be skipped.
Step 5: previewing and publishing
Click Preview to see how visitors see your site. Happy with it? Click Publish. Your site will then be online on the domain linked to the builder.
- Made changes later? Visitors will only see changes in the builder once you click Publish again.
- Restored a backup? Even then your site online only changes once you publish again afterwards. You'll find backups in My Sitebuilders next to the Backups button. We make one every night and keep the last 6.
- Deleting a site? Use Delete in My Sitebuilders to remove the entire website. This cannot be undone.
Choosing a different template
Want a different template for your site? First make a backup: in My Sitebuilders, click Backups next to your builder and then Make a backup now. If you don't like the new template, restore that backup.
Your site on your own domain
The Drag-and-drop Builder only works on a domain that's in a hosting package with WebOké and points to our server.
- Go to My Products › My Sitebuilders, tab Drag-and-drop Builder, and click Add.
- Enter your domain without www, for example
yourdomain.com, or a subdomain such asblog.yourdomain.com. A subdomain must first be created in DirectAdmin. - Choose the Free version or the Paid version and click Add.
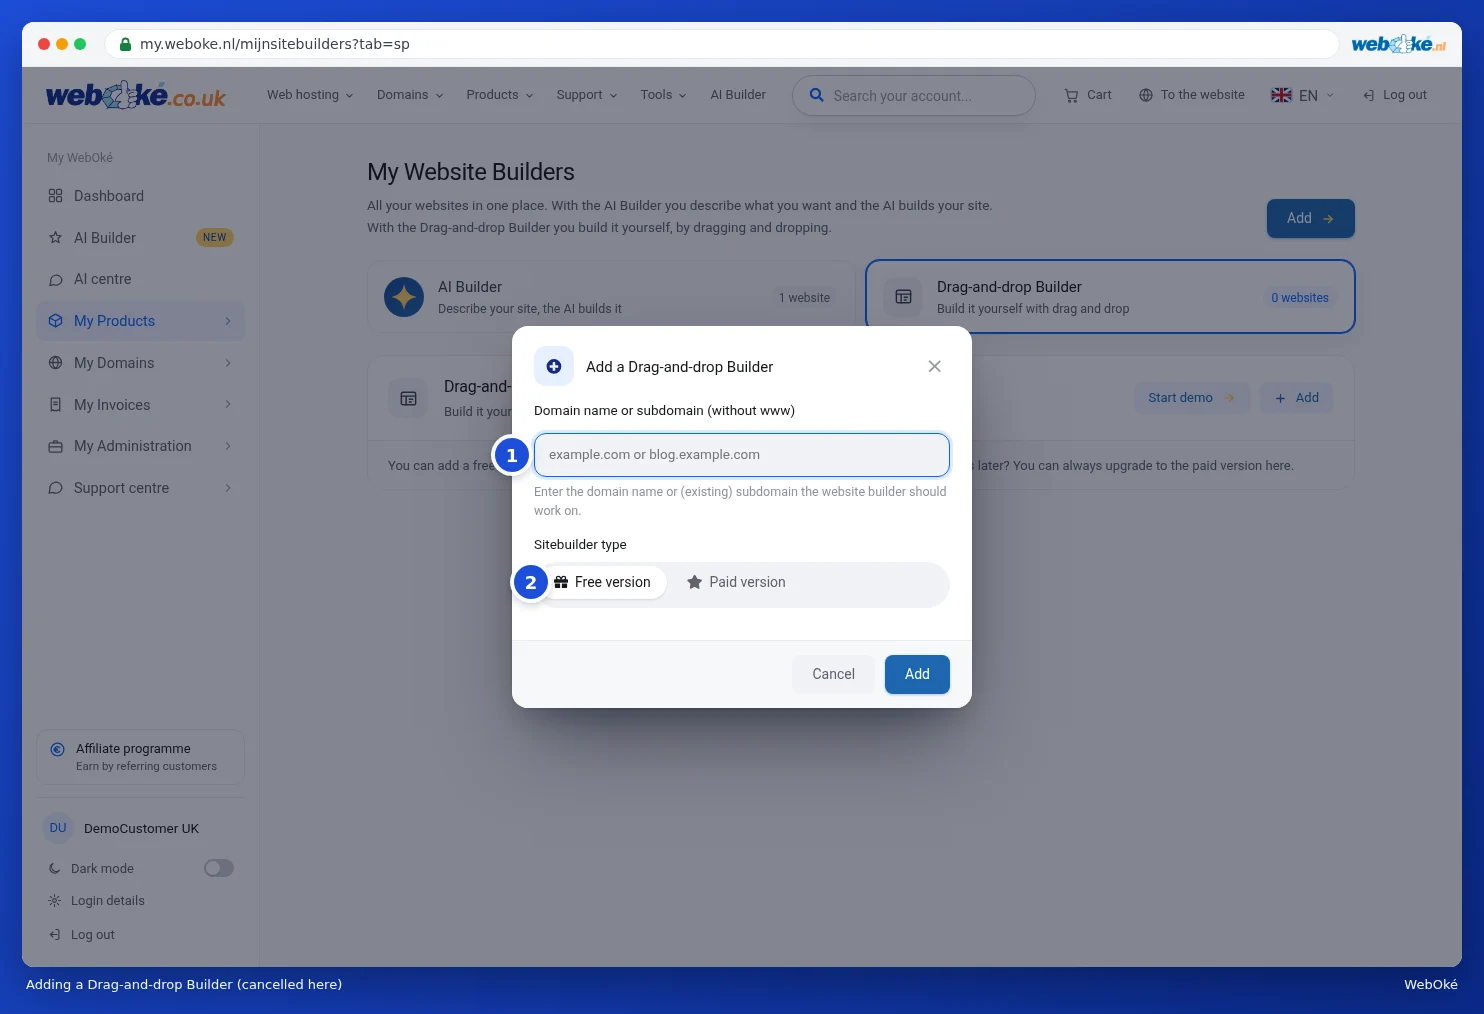
Want to publish the site on a different domain later? Click Change next to the builder and then click Publish again in the builder.
Getting a message that the domain doesn't point to our server or needs a hosting package? Then one of these things isn't right yet:
- The domain isn't in a hosting package yet. Add it via Adding or removing a domain from a hosting package.
- The domain is with a different provider. Set the nameservers there to
ns1.webawere.nlandns2.webawere.nl, or have the A record of your domain and www point to the IP address of your package. Read Hosting package for a domain that stays with a different provider. - The change isn't visible everywhere yet. A DNS change needs a bit of time, see How long does a nameserver or DNS change take?
If the domain points to our server, it will automatically get a free SSL certificate within a few hours. No padlock? Read Activating an SSL certificate.
Using the AI Builder?
A site from the AI Builder is first hosted for free on an address of ours, such as name.weboke.site. For your own domain you need the AI Builder package. If you have a hosting package with one domain, you can convert it using Convert package. Then click Go online in the builder and choose In your own hosting package. If your domain is elsewhere, have it point to us as described above.
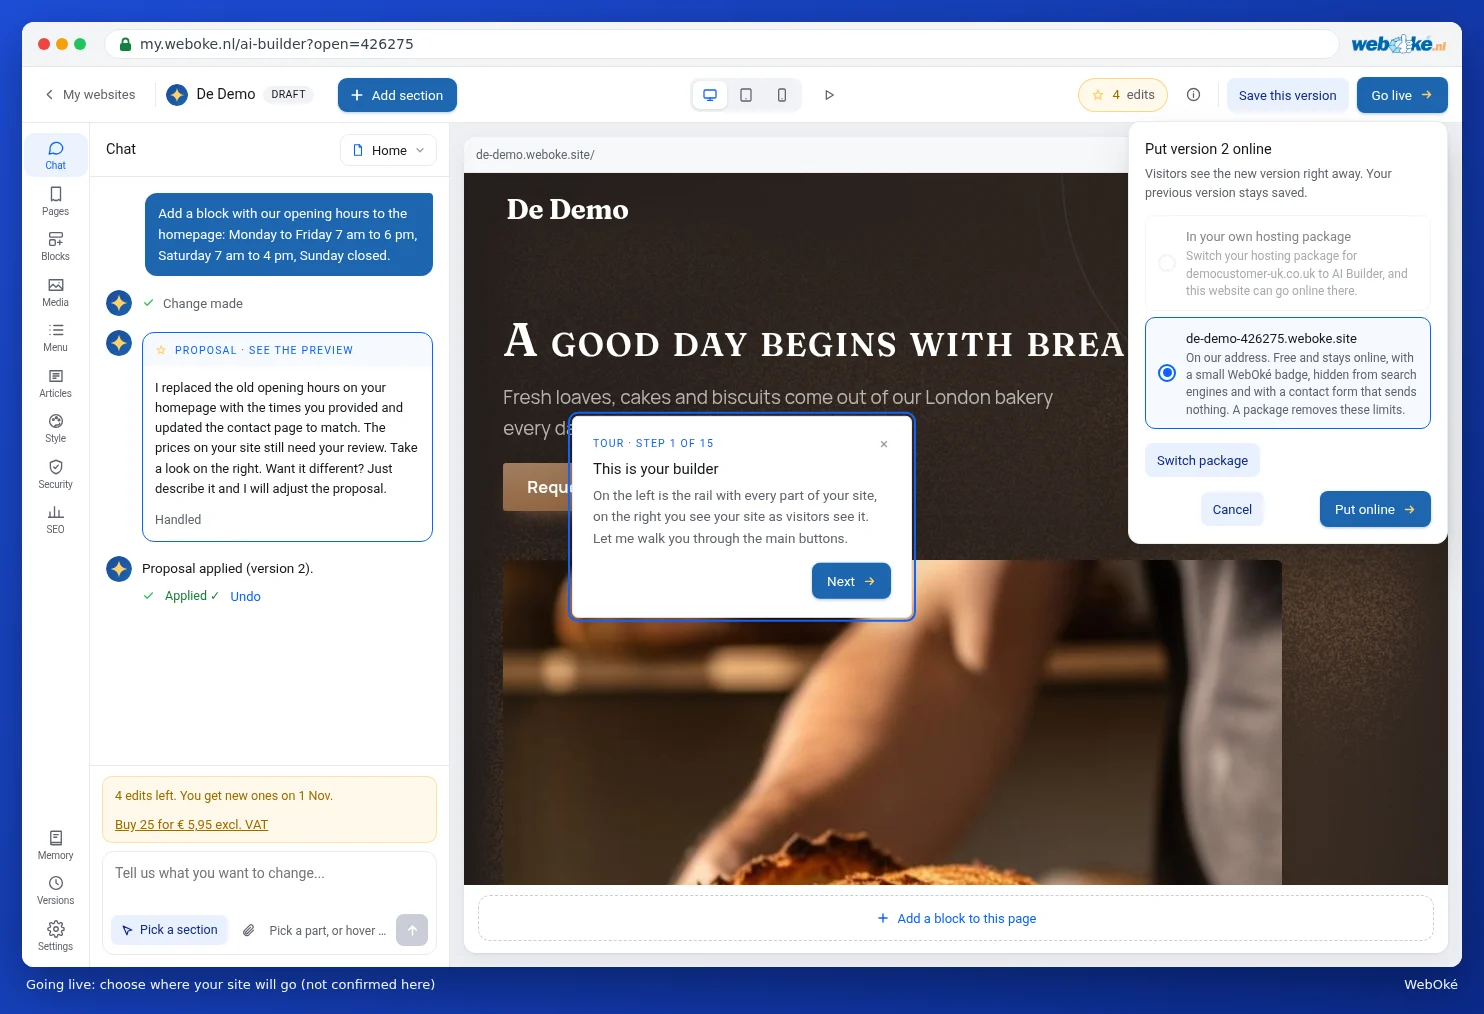
If you make a change afterwards, visitors will only see it after Publish changes. In the same window you can also take your site offline again; the site itself remains saved.
Detailed explanation with screenshots: The drag-and-drop builder and AI Builder: customizing, versions and publishing in the WebOké manual.